Okay, so let me start by saying that I’m part of the over forty crowd. Girls don’t tell, so I won’t go into details, but let’s just say, the texture of my eyelids has changed over the last ten years, I have radically altered how I wear my makeup, and my oldest son is a preteen.
When I first started selling and making mineral makeup, I, like many first-time mineral make up users, refused to wear shimmery makeup on my eyes. Occasionally, I would apply some shimmer to my shoulders or décolleté, but never on the face. Then one day, I finally took the plunge, and allowed a makeup artist working at my kiosk here in Baltimore to ‘do’ my eyes. She was young-ish, so naturally reached for some pretty sparkly powders that I assumed were only appropriate for the 30 an under crowd. Well, boy was I wrong!
My eyes looked fabulous: alluring, bright, and sexy. My normally dark, sculpted, matte look (very eighties I’ll admit) had been replaced by a look that was so refreshing, that I immediately began receiving compliments from people who had known me for years. They said things like, “wow, what did you do, get some sleep?”, or “did you do something to your skin?”, or “ you look beautiful”…..etc…..mmmm, didn’t that feel good!
So, of course, I delved right into the whys and hows of this new, quite encouraging phenomenon in my life; the instant face lift in a little jar of powder.
Some of you may already understand this, and I’ll try not to get too technical: Minerals, depending upon how they are cut, can change how you see light, as well as the mineral itself. Good example: diamonds. A rough diamond is not at all attractive, but a well-cut one has multitudes of sparkles, with light literally bouncing off of it in delicate and constantly moving points of rainbow colors. Well, the minerals used in makeup are no different. In fact, one of the main minerals used in the sparkly, shimmery, and shiny (three different things but I’ll get to that later) powders that are all the rage now, is Titanium Dioxide. It has a very high refractive index, (refraction is the bending of light displayed by the example of diamonds), so in a cosmetic lab, milling of minerals includes carefully cutting minerals to accentuate and amplify their capability to ‘bend’ light as it meets the eye.
The result can be anything from a simple shimmering effect to an actual layering of color whereby the eye sees rainbow hues. So what does this mean to your face, your eyes, and your mirror? It means that when you apply makeup that has a decent content of finely, carefully milled refractive pigments, that your face and eyes gain a certain ‘glow’, or dewy effect. This can serve to brighten up the eye area, deflect light away from blemishes and skin imperfections, and create a more refreshed and youthful appearance.
Now, if you are like I was, you’re probably digging in your proverbial heals even right now as we speak. Here’s what I’ve heard women say about this topic.
“ Not me, I have crepey eyelids, I can’t wear mineral cosmetics ”
“ Not me, I have very dry skin on my face, I can’t wear powdered makeup ”
“ Oh, shimmers are so inappropriate for my age-group ”
“ Only teenagers should wear that stuff”
“ I’ll stick to my Lancome ”
“ I hate that glow that mineral makeup gives to the face “
I’ve heard it all, and I’ve seen it all. What I’m here to tell you in the article, is that you CAN wear mineral makeup that has pearlescent effects as long as you know HOW! I’ve successfully applied mineral makeup to many, many women over the years, and they all walk away very pleased. So, in the next section of the article, I will break down for you in detail, exactly how to pick age and complexion-appropriate mineral shadows and face makeup, and also how to apply it for the optimal effect.
Choosing the correct Mineral Shadows and Face Makeup
To start, let me clarify that ‘mature skin’ is a designation of skin condition, not of the age of the person applying the makeup. Skin health and appearance varies wildly from one person to the next. The type of issues that appear as we grow older are: crepey skin around the lids, more recessed eyes, lines under the eyes and on the forehead, sagging skin around the jaw line, and ‘fuzzy’ lips that tend to bleed lip colors. So if your skin is smooth, wrinkle free and firm….well….you must be well-preserved! For the rest of us, I’m going to first outline some basic guidelines to follow when choosing products and shades.
1. Lighter shades are optimal: My mother used to say that I had bedroom eyes. I loved to accentuate this with dark shades in my crease that would recess my eyes. Now my eyes seem to be recessing just fine on their own. I used to scoff at light shades on the lid! Now I adore them. The lighter shades brighten up the eye area, especially when using mineral pigments, due to the silky sheen that catches and plays with light.
2. Choose semi matte vs. matte: Contrary to what many women believe, mattes are not the best option for mature skin. Mattes are ideal for the 25 and under crowd who want a more dramatic and ‘made-up’ look. Mattes tend not to look as natural as semi-mattes. The reason for this lies in the formulation itself. Mattes are made with heavier, more opaque pigments that don’t allow your skin to shine through the makeup. Semi-mattes on the other hand (this will vary from line to line, but basically you are looking for a finely ground powder that the vendor advertises has a soft silken texture) are quite sheer. This may seem like the wrong product choice, since the question is, “Why would we want someone to see our skin with all of these blemishes, wrinkles and age spots?”. But actually, while deflecting the eye from skin problems, the sheerness of them creates a more natural looking finish. This is a really important point to make. At all ages, natural looking is more beautiful. All we are really trying to do is accentuate our finer points, not cover up our skin and face in its entirety.
3. Avoid shimmers or sparkles on “crepey” lids: Some customers will really disagree with me on this point, so I’d better present their point of view first. First of all, women in the medium to dark skin tone range generally benefit from wearing shimmers. The effervescence of the minerals looks wonderful, whereas on lighter skin, it accentuates the skin’s aging. The choice of whether to wear shimmers has somewhat to do with lifestyle.
When I worked at my store in Fells Point in Baltimore, a ‘mature’ movie star who was starring in a feature film being locally produced, used to visit my store at the end of each day. She would slather green shimmery eye-shadow all over her lids, ( # 63 lime versatile powder if anyone wants to see the shade I’m referring to) and the pinkest blush that I had on her cheeks. I tried to steer her to more sedate colors and application, but she looked at me and said, “Honey, at my age, and being an actor, I can do anything that I want! I don’t care if people think I’m a kooky old lady, so don’t try to talk me out of sparkly eye-shadows, that’s what I like!” Well, didn’t I learn my lesson! Who was I to decide what was ‘appropriate’ for someone else?! But for the purposes of reaching out to the majority of women in this age range that I speak to, and from my own expression on my face in the mirror after having tried some sparkly shadows on my lids, I simply don’t recommend it.
4. Less is more: Cut your makeup in half. If you wear three colors on your eyes, wear one instead. If you wear a deep, or bright lipstick, try a popping sheer gloss instead. If you wear foundation, plus powder, give up on the powder (I know it’s hard!), and just wear a sheer layer of foundation; enough to cover the areas that need it….let your skin shine through!
5. Forget about contouring the crease area: We all learned the three step process: lighter color on the lid, darker contour color in the crease, and a mid-tone color in the ‘corner’ of the eyes. I now do almost the opposite. I pick a multi-purpose semi-matte or low voltage versatile powder and apply it from lid to brow bone. The mineral shadows that I use (my absolute favorites are café latte from the Earth Collection, and Mermaid from the Sultry Collection) catch the light, and sparkle on my lid, and continue to brighten all the up to my brow. Now I only use dark colors very sparingly for a nighttime event. Otherwise, I end up achieving the opposite effect from what I desire.
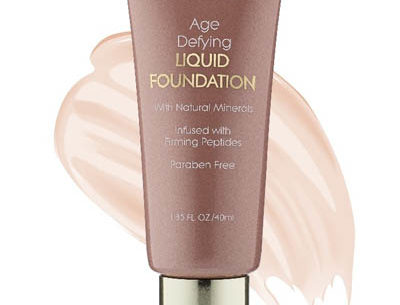
6. Go for dew not glow on face and cheeks: So, we talked about not using mattes. Well on the other end of the spectrum, there are brands of mineral foundation that are quite shiny. I find that this accentuates lines and blemishes. Instead, a product with a nice dewey effect is ideal for bringing a youthful appearance to the face. We’ll get into application in the next section, but for now, to choose a mineral foundation that is not glowy, just look for vendors’ descriptions of the texture of their foundations. Try samples first, and make sure to order the proper brush, since this is imperative for mineral makeup application to look natural.
7. Use the right color choices: If you don’t hide your grey, complement it by using cool tones, and peaches. If you had brunette, red, or black hair and brown eyes as a younger version of yourself, consider changing the makeup that you wear to lighter shades such as silver based pinks and beiges, cool greens and heathers. These will blend well with the silver tones in your hair. This also requires examining your wardrobe and culling out the darker, warmer shades such as brown, russet, and maroon, as these will tend to drag down your overall look.
How to Apply
Now that you have some basic guidelines under your belt, this section will provide a sample makeover with some detailed application techniques. I’m using as default a light-skinned woman with brown hair streaked with grey. The techniques still apply, but for medium to dark skins, a different palette with deeper tones would be apropos.
Step 1. First, cleanse, and moisturize the face (preferably with a creamy cleanser, such as a lotion, so as not to dehydrate the skin.
Step 2. Next, decide if you prefer to use the mineral makeup dry with a brush, or mixed into your moisturizer.
If your skin is very dry, and you need minimal coverage, I would recommend mixing the powdered mineral makeup into your moisturizer, or purchasing it premixed into a natural cream formula. This will offer you a more natural-looking dewey effect, and will provide extra moisture for your skin. To mix mineral foundation into a cream, simply put a dollop of cream into the palm of your hand, and then tap a little bit of powder into your palm as well. Mix the two together and then apply a small amount to your face with your finger, or if you prefer, a sponge. If the coverage is not heavy enough, tap a little bit more powder into your palm until you have your own preferred ratio of powder to cream. This may seem tedious, but is wonderful in that you can control your coverage, while a pre-mixed cream would have it’s own coverage level built into the product.
If you have normal to oily skin, need heavier coverage, or need all day wear because you are very active, then I would recommend using a powdered loose mineral foundation. Once your moisturizer has settled, use a flat top foundation brush, or kabuki, to firmly brush a small amount of the foundation over one cheek until the coverage is achieved, then repeat on other cheek, chin, nose (great on spider veins) and forehead. A flat top does not need a small concealer brush to get around the nose, just twist the brush around a bit, and it will catch those corners. If you have red, purple or dark colors around your lids, or under your eyes, keep brushing around those areas too. The foundation will lighten, and diminish these tones.
Step3. Choose a light-medium semi-matte pearlescent shade. It could be a peach, a taupe, a silver-beige, a pink, or for darker skin tones, a lighte silver brown or mauve. Using a brush with very short, thick hair (in the Monave line, it is called a firm shadow brush), sparingly apply the semi matte all over the lid and up into the brow line. If your eyelids sag, thus diminishing your lid size, be sure to use that shade all the way up to the brow bone (not to the brow itself, but to the bottom and a little bit over the brow bone). Remember, this color will ‘wake up’ your eyes, so be generous with the area in which you apply it.
Step 4. Eyeliner. If you are comfortable using a brush to apply liquid liner, follow this step, if not, substitute with a pencil liner. Pick a smokey blue, smokey grey, light brown or purple powder in the medium (dark for darker skin tones) range. I would recommend a matte powder for your liner. If you liquefy a pearlescent powder, it will create a shiny line over your eye, which isn’t necessarily the look you are going for. Use an angled liner brush, and starting at the outer corner, gently walk your line toward the inner corner with short steps. If you are already adept at using liquid liners, simply follow your own process. Once the powder has dried, correct any boo-boos with a Q-tip, rolled downward toward your inner corner. Buff out the line until it is soft. You may need to do this more than once until you get the line to the desired thickness, but remember, soft-focus works better to amplify the eye area. If your eyes do well with under-eye color, do the same, but make sure to keep the line thicker at the outer corner, and continue it half way to the corner, not the whole way.
Step 5. Use a white semi-matte shadow under the brow to provide one more ‘pop’ to the eyes. With a firm shadow brush, brush the powder directly under the brow, and watch your eyes open up even more!
Step 6. Finish off your eyes with brown or black mascara. Don’t use black mascara if your hair is blond, light brown, or silver, use brown, or dark brown instead. Dramatic works when we are younger, ease up a little!
Step 7. Brush a light peach, neutral, or mauve/brown blush on your cheeks. Again, I recommend semi-matte not matte, or shimmery. It’s nice to see a little glow on the cheeks. I prefer using a bronzer brush with semi matte blushes, because it gives more control over the application and creates a soft – glow effect.
Step 8. If your lipstick tends to bleed, try using a lip liner in a shade darker than your skin tone. It doesn’t have to be pink, red, or another color that will be glaring when the lip product fades away. Rather look for neutrals that will help contain without leaving a harsh line. To pick a lip color, go for soft shades with less punch. Why? Because our lips tend to get smaller as we age, and dark colors will make lips look smaller. A little shine, and gloss will actually bring out the beauty of your lips. Try some. You may think ‘gloss’ is for girls, and ‘lipstick’ for women, but this is not always the case. I introduced my mother to gloss a few years ago, and she loves it! She gets compliments whenever she wears her gloss, and the shine brings out the silver in her beautiful hair.
Finally, look in the mirror, and say, “ I’m beautiful”. Cancel out the constant harangue about the railroad tracks between your eyes, the wrinkles around your lips, and everything else that shows the passing of time. Recognize that you are only as beautiful as you carry yourself. I hope your makeover will help add a special glow and lift to your face!
Deborah Bilezikian
President, Monave Mineral Cosmetics
copyright 2007 Deborah Bilezikian
Learn How to Paint a Natural Face, using mineral makeup.
(The picture below has not been touched up!)