I’ve heard many bare-faced women state that they don’t regularly wear makeup because they believe it would look unnatural. It takes great effort on my part to convince them that in five minutes or less, I can make them look better, without an obviously “made-up” look. Most women have visited a cosmetics counter and gotten a makeover that they wiped off as soon as they saw their face in the mirror. All of us have seen women with tarantula lashes, bright spots of blush, and a line of demarcation around the jaw. But I know from personal experience, that a woman can improve her God-given looks without detracting from her natural coloring and features.
Since we represent many different complexions here, I will break this article down into four sections: Blond, Brunette, Medium, and Dark.
But first, let’s talk about why makeup often seems so unnatural looking.
Most cosmetics are produced with a combination of mineral pigments, organic colorants like carmine, which comes from a beetle, and dyes. As we all know, you can’t get neon green from natural pigments. Nor can you achieve a bright red. Many a time, I’ve had customers complain that my line of cosmetics doesn’t have a “true” red. Well, it just doesn’t exist in the mineral world. So if you shop for makeup, shop MINERAL makeup. There are many wonderful lines out there to choose from, and I guarantee, that will eliminate the more unnatural colors from your palette.
This having been said, let’s begin.
Blondes:
Your best color choices for a natural look are beiges, browns and peaches. This palette will work whether you have blue, green or brown eyes. Some moss or light lime greens are also a nice addition.


First, apply a loose mineral foundation with a kabuki brush or a flat top bronzer. The brush is very important to the application process. Mineral foundation has no fillers, so if too much is applied, or it is not blended properly, then the face can look pasty or chalky. A customer with very dry or mature skin can blend a bit of the powder into their moisturizer, and that gives a lovely finish as well.
If you are thinking about skipping this step, don’t. Even if you have decent skin, you absolutely must wear a sunscreen every day, and mineral foundation has a very high SPF. As a makeup artist, I can attest that foundation, mascara and lip color are the three most important products that you can apply for instant transformation.
Next, brush a light beige or peach shadow over your lid. You can use either shimmer or matte, depending upon your mood. For the best application, use a very firm shadow brush made of natural hair. Using a floppy, large-headed brush, or a synthetic brush, will cause too much powder to be applied. To achieve a natural look, it is important to use small amounts of your products so that you see the skin underneath, not the makeup.
Next, apply a soft warm, brown shadow in your crease. A loose powder is an excellent choice because of the fact that it won’t look too heavy. Some women don’t know exactly what the “crease” means. Simply follow the crack in your eyelid and blend the product a little bit over the crease, so that you can see it. Don’t go all the way up to the brow bone.
Some mineral powders can be used wet to create a liner. Simply wet a taklon liner brush with tap or spring water, and then dip the wet brush into the same brown powder that you used in your crease. This ensures that your liner is not “fighting” with your shadow in terms of color. The fewer colors that you put on your face the better, for this kind of look. Make a paste with the water and powder on the back of your hand or the top of the product, and then once you have a creamy consistency, draw a very thin line as close to the lash as possible. Makeup artists usually touch the lash as they are drawing the line. A heavy line should be saved for a more dramatic look. If you are leery of using a liquid liner, use the same brush with a light brown liner pencil or in a potted liner. Simply rub the brush into the pencil head or pot, and then apply it the same way as explained above.
To open up the eyes, some brown or brown-black mascara is recommended. This is an important, but light touch. The secret to mascara looking natural is not to spread it over the whole lash from bottom to top, but rather to paint only the tips. Go ahead and brush them twice, concentrating only on the tips, but no more. People will tell you that you have beautiful, long lashes.
For a natural look, try using bronzer instead of blush. The difference is that you are not applying more color to your face. As pretty as a blush can be, even when done right, it is an obvious form of makeup. It is girly, coquettish, and fun. A bronzer is simply a deeper color than your skin tone. Because the base is brown, it blends in more with your own natural coloring. Brush it on the apples of your cheeks sparingly and your face will look healthy and flushed.
Finally, your lips. For your complexion, try a peach or neutral pink lipstick. If your lips are highly pigmented, you can also move into some brownish reds. Lipsticks tend to be more sheer, and more matte than glosses. Skip the liner for this look. Lined lips tend to look sexier.
Now your look is complete. Once you get the hang of it, this look will take under five minutes to complete. For an on-the go purse pack, look for cream to powders in your shades, and purse size foundations and brushes. Mineral makeup does not easily wear off, so you should be able to get through the day without much more than a midday rebuff.
Now, on to our Brunettes:


Your eye colors should be in the Earth family, including beiges, taupes, and browns. Your lip colors should be brown-reds, or light mauves.
First, buff the correct foundation color into your skin. Your color will probably be in the neutral or olive family depending upon your background. If you have oily skin, follow up with some pure serecite (untreated mica), or a light, natural setting powder. Avoid setting powders that contain talc or cornstarch as their base ingredient, as they will make your face looks powdery or chalky.
Next, spread a beige or pink-beige shimmer or matte over your lids, using a small amount. Another trick to try is to use a mineral foundation shade one color darker than your face, and apply that to the lids instead of shadow.
Next, use either a taupe, a deep earthy green, or a brown in your crease. Save a darker brown for the evening, as it will make your eyes look too dramatic. Apply a very light amount, making sure to blend it well at the corners of the eyes.
For a liquid liner, use your brown mixed with pure black mineral powder (mica), and that will give you a lovely espresso brown liner. Simply wet the brush, then dip it into the brown, then the black, and mix on the back of your hand until the two colors blend together. “Walk” your liner brush across your eyelid, staying very close to the lash. This should make your eyes pop out. Follow with black mascara, applied lightly to the tips of your lashes.
Skip the blush, but apply a light or medium bronzer on the apples of the cheeks. Use it sparingly so you achieve a natural looking glow. Look for a semi-matte or matte bronzer rather than a shimmer bronzer.
Finally, for the lips, use a light brown- red brick color on the lips, or a light mauve. Berry colors and reds will immediately draw attention to the mouth, so save those for an evening look.
Medium Skin Tones:
Browns, grays and mauves all look light and natural. Blues will show up more. Mauves and browns look perfect on the lips.
Foundation: Most medium skin tones have a lot of yellow in them. Some have some red undertones as well. Test your foundation choices on clean cheeks, not on the neck, as your neck is naturally lighter. If you have oily skin, make sure to gently exfoliate, cleanse and moisturize before applying your foundation. To reduce shine, buff a small amount of serecite over your foundation.
Next, choose your color palette. If you’d like the most understated look possible, browns and deep gold will do the trick. First apply a deep gold on your lid. Shimmer wears well on medium skin tones, even during the daytime. You can also use the gold as a light highlighter under the brow. It’s very important to blend a highlighter very well, so that it gives a light glow without being obvious.
Next, brush a deep brown or plum in your crease. Start with a small amount and build up color to your taste. A matte color is preferable for this step.
For your liner, a deep plum adds more color than might be desired, so stick with a plain black, or a deep espresso brown. Use your wet liner brush, and walk the brush across the lid, following the shape of the eye. A slight lift at the corner of the eye is always pretty.
For the lips, medium mauves and mauve-browns are understated. Because your lips have a lot of pigment in them, a clear gloss with a light plum liner is another good choice.
Darker Skin Tones:
Your best choice for a “natural” look is a palette in golds and bronzes. Incorporating some deep plums and browns is a nice touch as well.
Foundation: Your skin tone will vary from blue undertones to red, to deep caramel. Be very careful choosing your foundation color. Avoiding commercial makeup will help steer you away from the “red” face that many dark-skinned women apply. You may need a custom color that supports more than one undertone.
Your best option is to use it dry. Make sure to buff it very well into the skin. For the under-eye area, mix a touch of the powder into a handmade cream, and then gently spread it under the eye area. Add more powder if need be to create heavier coverage. Finish up with a light dusting of the foundation.
For the eyes, apply a deep gold, shimmer or semi-matte, or bronze to the lid. This will open up the eye area, without being too obvious. For some depth, apply a deep plum shading color in the crease. The gold could also be used sparingly under the brow as a highlighter.
For your liner, apply a very thin line of black or deep plum liquid liner around the upper lash. Follow the directions above. Follow up with a black mascara applied to the tips of the lashes to lengthen them.
If you prefer a blush, stick to a medium plum with brown undertones. Red would give the face a more “made-up” look, so save that for a different occasion.
For the lips, line in a deep plum and add a touch of plum mineral powder to a clear gloss and fill it in. If you don’t want a glossy look on the lips, use a lip balm instead, and mix a touch of the plum powder into to create a light, natural tint.

Tools of the Trade:
To apply mineral makeup, you do need to familiarize yourself with brushes. While you can get away with applying mineral shadows with a Q-tip, you need the right brushes for the other applications. The brushes should be made of natural hair. There is no cruelty involved. The animals’ hair is cut or shaved. Price is a good indication of the quality of a brush. Natural hair brushes are a life-long investment.
Firm shadow brush: This is used for applying mineral powders to the eyes. The brush should have a short, firm head, and be somewhat narrow. When working with loose powders, there is the potential for a fluffier brush applying way to much product.
Liner Brush: For this brush, you want to look for a yellow or white head that is made of taklon. This ensured that the brush will remain firm when you wet it, and line the eye with it. Natural hairs will tend to splay out too much. Some women prefer a straight head, others an angled head. The head should be a about ½ inch wide.
Fan brush: For mineral blush, this is a fantastic brush, due to the sparse hair. If you cannot find a fan brush, then a cotton ball works well. A typical blush brush will apply too much powder to your cheeks.
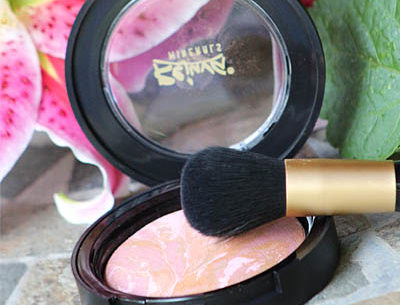
Kabuki Brush: This is the most popular brush for applying loose mineral foundation. The hair is very soft, short and dense. This brush is crucial for achieving a natural-looking finish to your foundation. If you use a typical face powder brush, you will not be able to “buff” the foundation into your skin. There must be some pressure applied, and the short hairs stand up well to the pressure. There are many kabukis on the market, so make sure to ask a supplier which one is the softest, and densest.
Flat-top Bronzer: This is an alternative to the kabuki for applying foundation. It is my favorite, due to the shape of the head. Because it’s flat, it “bends” around the nose and under the eye with much more agility than the round-topped kabuki. Again, look for one with short, soft, dense hair.